About this book
Turn flat shapes into solid forms.
Middle-school artists learn to see spheres, cubes and cylinders inside everyday objects, show depth with overlap and viewpoint, follow the light across highlights and shadows, and revise drawings from what they observe.
- Construct forms with ellipses and simple perspective
- Build value scales and shade with a clear light direction
- Plan, draw, compare and revise a still life
With clear drawing criteria and explained answers
Look inside
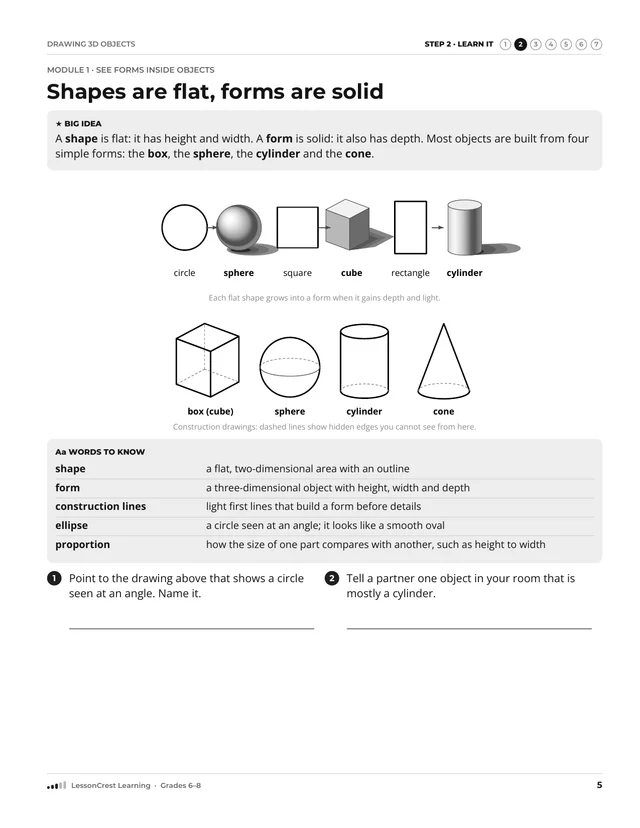
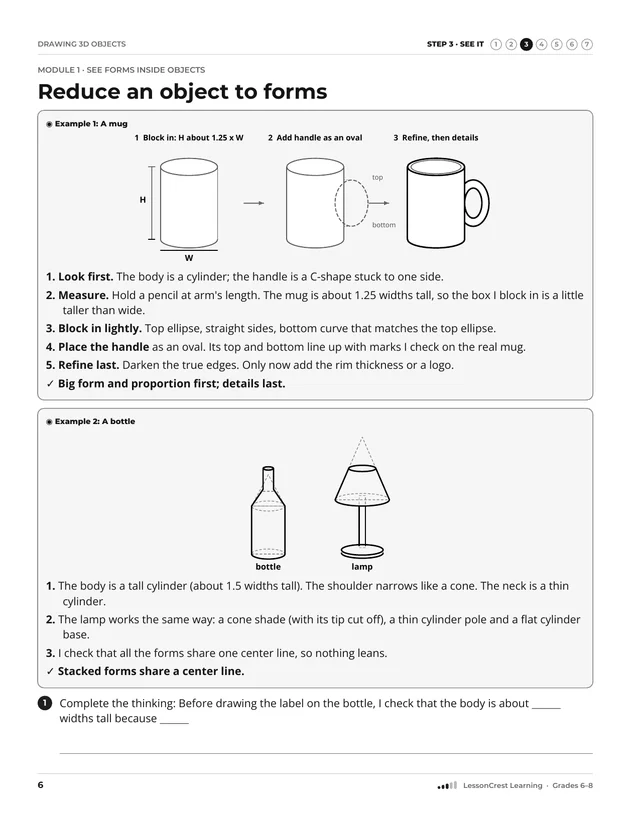
What this book covers
Covered
In scope: shape and form, proportion, ellipses, overlap and eye level, simple one- and two-point boxes, value scales, light and shadow on basic forms, small still lifes and revision.
Not covered
Not covered: full perspective systems, figure drawing, color mixing and paint.
Before you start, you should be able to
- Draw controlled light and dark lines
- Draw basic shapes, including an oval (ellipse)
- Tell light values from dark values
- Use pencils, erasers and sharpeners safely
Things to have
- HB and 2B pencils (a 4B is useful)
- Eraser and a hand-held sharpener with a lid
- Blending stump or folded paper towel
- A desk lamp and a few plain objects: mug, box, ball, can
Notice
Pictures in this book are simplified learning models. Check answers with the explanations at the back of the book.
The steps in this book
- Step 1: Get Ready
Check the skills you need before you begin. If something feels tricky, an adult can help you start in the right place.
- Step 2: Learn It
Read a short, clear explanation of the new idea and the words that go with it.
- Step 3: See It
Watch the idea being used, one step at a time, in a worked example.
- Step 4: Try It Together
Practice with prompts and help cues. The help gets smaller as you get stronger.
- Step 5: On Your Own
Practice on your own with different kinds of questions, and explain your thinking.
- Step 6: Look Back
Look back at earlier learning so it stays strong, then check where to go next.
- Step 7: Check and Fix
Check your answers. Each answer explains why, names a common mistake, and shows how to fix it.
What is in the book
The modules
- Module 1: See forms inside objectsPages 5–14
- Module 2: Viewpoint and spatial cuesPages 15–24
- Module 3: Light creates value patternsPages 25–34
- Module 4: Observe, revise, and explain choicesPages 35–44
Contents
- Readiness check, pp. 3–4. Before Module 1. Its table tells you where to start.
- Modules, pp. 5–44
- Checkpoints, pp. 14, 24, 34, 44. The last page of each module.
- Mixed review, pp. 45–48. Questions from across the book, mixed together.
- Exit check, pp. 49–50. A last check across the book.
- Reflect and repair, p. 51
- Try again, p. 52. Fresh questions like those in the exit check.
- Extra practice, p. 53
- Answers and explanations, pp. 54–64. Notes in this part are headed “Why”, “Common mistake”, “Help” and “Look for”.